The following Flow will demonstrate how to extract the text layer from a file, send to the 'Key Phrases' text analytics action for analysis before using the results to automatically tag the SharePoint document.
Please note: You will require an Azure subscription and a cognitive services account to utilise the Flow Text Analytics connector, you can create a free account here.
Flow Creation Steps
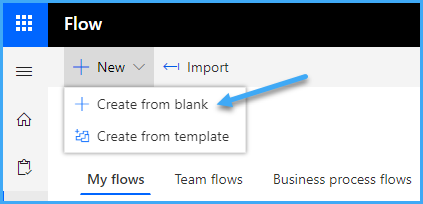
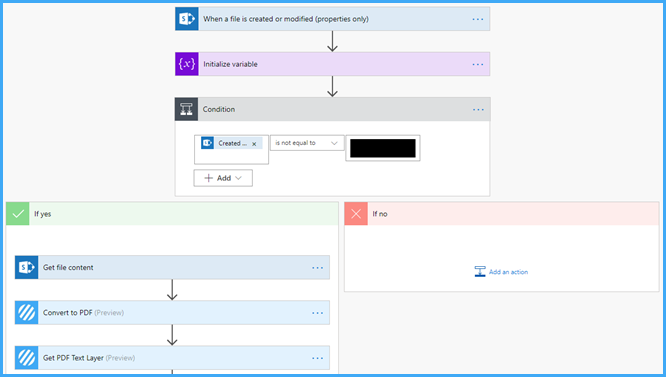
1. Create a new Flow from a blank template
2. Add the ‘When a file is created or modified (Properties Only)’ SharePoint trigger and configure it to point to the library/folder where the Flow should be triggered from.

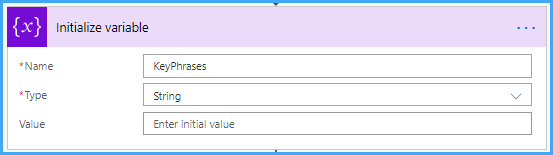
3. Add an 'Initialise variable' action
3a. Name: Set to 'KeyPhrases'
3b. Type: Select 'String'
NOTE: This flow will be triggered by either a new document being added or an existing document being updated, so this Flow will then update the exact same document again. This will cause an infinite loop (a recursive event). To protect against this we recommend using a service account identity for the SharePoint connection which will ensure any updates to the document made by the Flow are executed by the same identity. We will then add a condition to the Flow to check for and ignore any Flows which have been triggered by an update to the document made by the service account identity.
4. Add a 'Condition' action
4a. Click 'Choose a value', insert the 'Modified By Email' parameter from the 'When a file is created or modified (properties only)' trigger
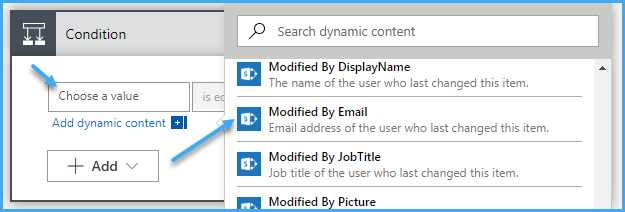
4b. Set the operator to "Is not equal to"
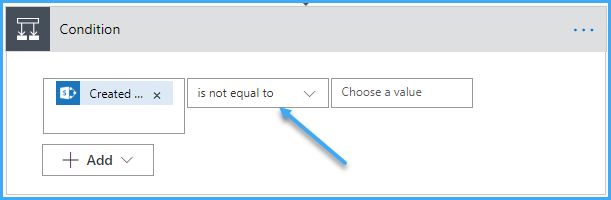
4c. Set the value to the email address of the SharePoint connection's identity
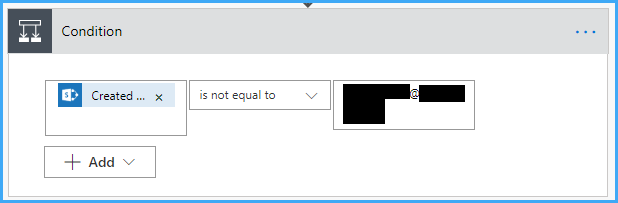
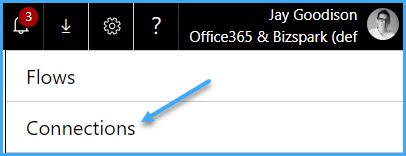
4d. If you are unsure of the identity or wish to create a new connection, go to 'Settings > Connections'
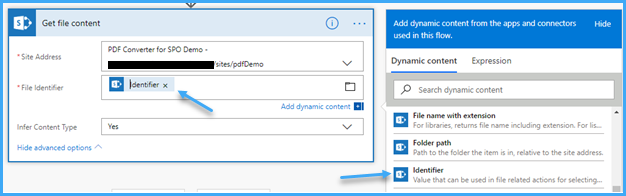
5. Add a 'Get File Content' SharePoint action, inside the 'Yes' channel
5a. Site Address: Set as per the 'Site Address' value of step #2.
5b. File Identifier: Insert the 'Identifier' parameter from the 'When a file is created or modified (properties only)' action result
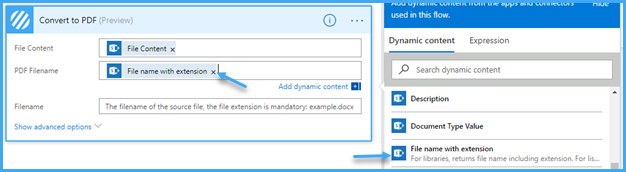
6. Add an Encodian 'Convert to PDF' action
6a. File Content: Insert the 'File Content' parameter from the 'Get file content' action result
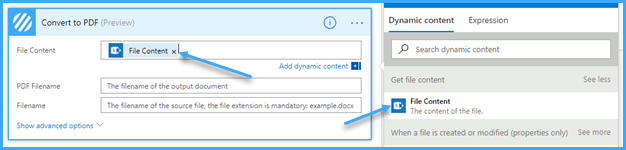
6b. PDF Filename: Insert the 'File name with extension' parameter from the 'When a file is created or modified (properties only)' action result
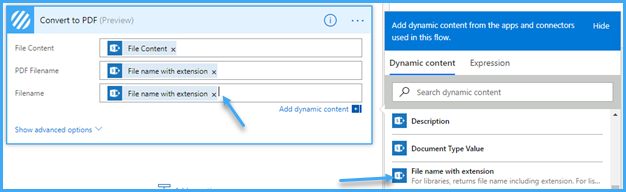
Note: The Encodian 'Convert to PDF' action will automatically check the 'PDF Filename' value and change the file extension provided to '.pdf' if required.
6c. Filename: Insert the 'File name with extension' parameter from the 'When a file is created or modified (properties only)' action result
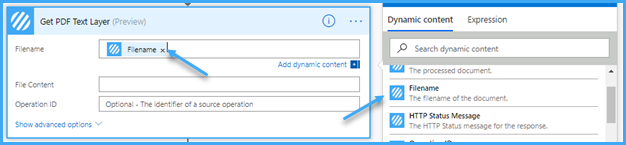
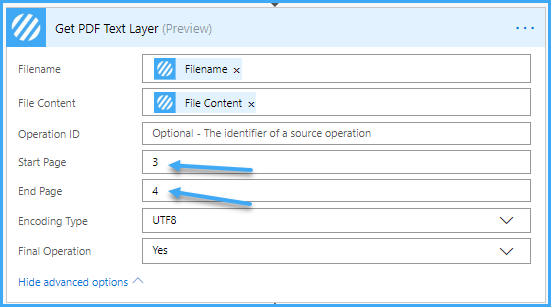
7. Add an Encodian 'Get PDF Text Layer' action
7a. Filename: Insert the 'Filename' parameter from the 'Convert to PDF' action result
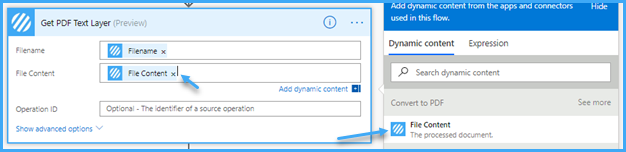
7b. File Content: Insert the 'File Content' parameter from the 'Convert to PDF' action result
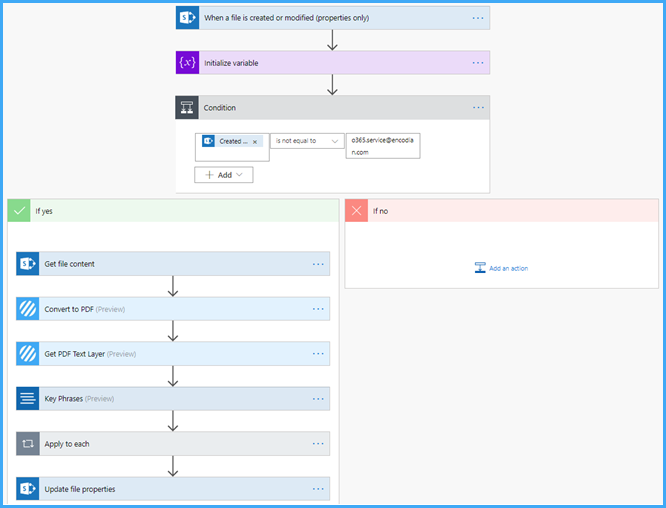
8. Checkpoint: Your new Flow should look similar to the following:
9. Add a Text Analytics 'Key Phrases' action
NOTE: If you have not already created a connection you will be prompted to create a new Text Analytics connection utilising a cognitive services account hosted within an Azure subscription, you can create a free account here.
If you need to create a new connection please follow these additional steps:
9a. Connection Name: Enter a name for your connection
9b. Account Key: Enter the key obtained from your Cognitive Services account
9c. Site Url: Enter the endpoint obtained from your Cognitive Services account
9d. Click 'Create'
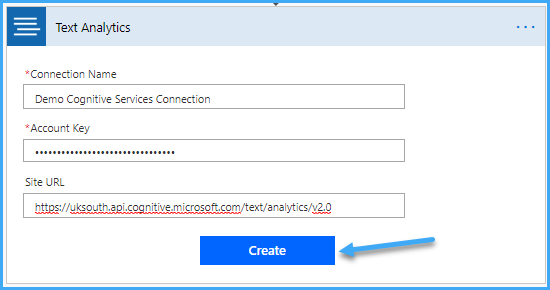
Once your connection is created or if your connection was previously created, follow these steps:
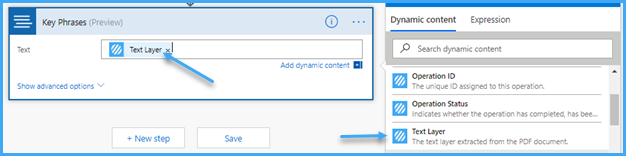
9e. Text: Insert the 'Text Layer' parameter from the 'Get PDF Text Layer' action result
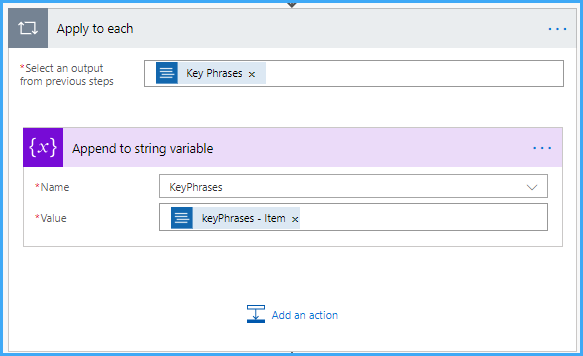
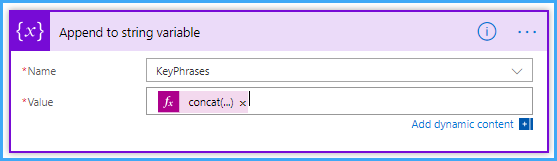
10. Add a 'Append to string variable' action
10a. Name: Set to 'KeyPhrases'
10b. Type: Insert the 'keyPhrases - Item' parameter from the 'Key Phrases' action result

concat(items('Apply_to_each'), ', ')
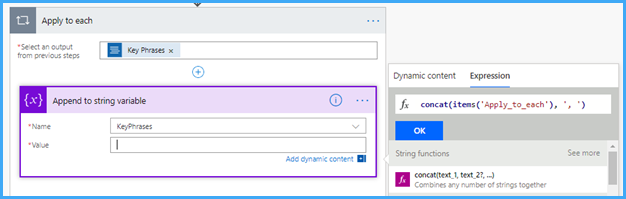
10e. Click 'OK'
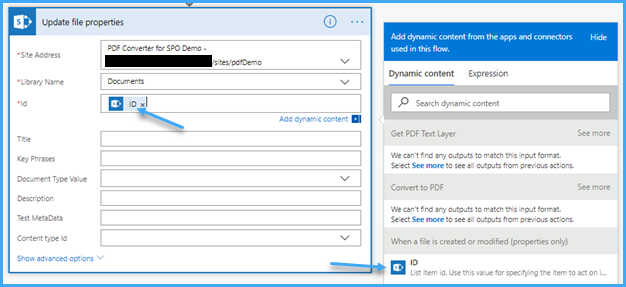
11. Add an 'Update File Properties' SharePoint action
11a. Site Address: Set as per the 'Site Address' value of step #2.
11b. Library Name: Set as per the 'Library Name' value of step #2.
11c. Id: Insert the 'ID' parameter from the 'When a file is created or modified (properties only)' action result
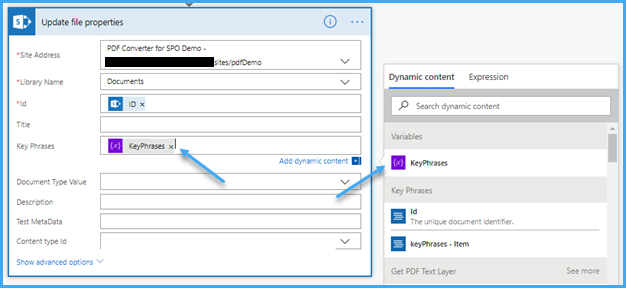
The next step is to utilise the data returned from the 'Text Analytics' action and write to a metadata field associated with the source item. We have added a 'Key Phrases' column to the library to store the data.
11d. Key Phrases: Insert the 'KeyPhrases' variable
11e. Check and update the SharePoint connection and ensure the service account identity is used, see step 4.

12. Completed: Your flow should appear as follows
12. Test the flow

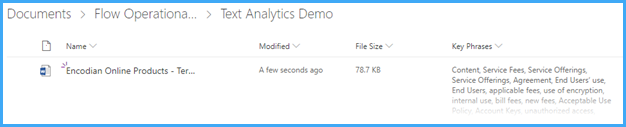
13. Validate the results
Please note: The 'Text Analytics' action is limited to processing 5120 characters per request. It is likely that you will exceed this limit by sending an entire document, however, the Encodian 'Get PDF Text Layer' action allows you to target specific pages which can help keep within this limit.

0 Comments